IN THIS ISSUE
Tips On Full Frame and Traditional Cropping

Cropping For Beginning Photographers and Serious Amateurs on iPrints.com

  ____________________
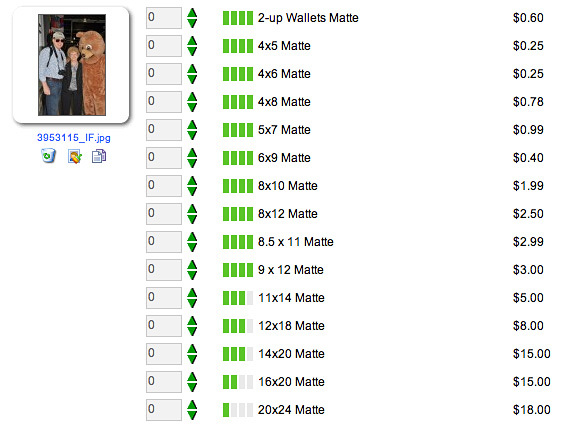
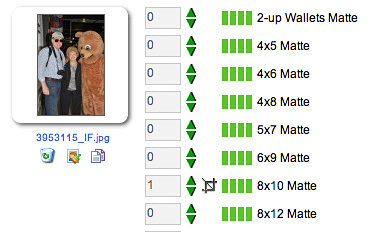
QUICK LINKS FOR ONLINE ORDERS

  ____________________


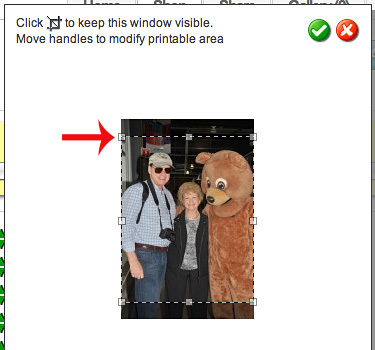
Some Tips For Creative Cropping

Many good photographs can be made even better with a little selective cropping.

Yet, when we speak to photographers we find that a lot of people aren't 100% sure about how go about cropping their digital images.
So, they don't bother cropping.

I'd like to show you easy ways...without the need for Photoshop...to use our online programs to crop your pictures.

Try these simple tips and you'll see how easy it is to improve your pictures.


Best regards,
Dale

________________________________
All Cropping Begins With the Print Size You Choose

There are two groups of print/enlargement sizes you can choose; full frame or traditional print sizes.

Full Frame sizes will include your entire camera image. They're ideal for proofs and panoramic views, where you want to include everything you've shot.

The full frame image as shot by the camera.

Full frame sizes are:

Proofs: 4" x 6" • 6" x 9"

Enlargements:
8" x 12" • 12" x 18"• 14" x 20" • 20" x 30"

Traditional Sizes
are great for enlargements. Their dimensions often "feel" better to the eye.

Traditional sizes have a shorter, rectangular dimension (aspect ratio.) This will result in cropping out (removing) a portion of the original image from the finished print. In these pictures only the portion outlined in red will show on the print.

An auto-cropped image to an 8" x 10" format. Light areas will be cropped out.

The cropping tools in our online programs will allow you to easily select the section of the picture you want to include in your print.

By moving the crop box slightly to the left you can get a better print.

Traditional sizes include:

Proofs: 5" x 7"

Enlargements: 8" x 10" • 11" x 14" • 16" x 20"20" x 24"


Tip:
Both full frame and traditional sizes can be cropped using our online software. So, you can crop any image for print sizes 4" x 6" to 20" x 30" for better compositions.

Here's a full frame picture of a beach scene:

Dimensions of a 4" x 6", 8" x 12", 14" x 20" or 20" x 30".

This is a cropped print of a portion of the same scene. We used the online tools we'll show you in the following section to maintain full frame dimensions (aspect ratio) while zooming in to a picture-within-a-picture:

Same full frame enlargement dimensions of a portion of the picture.


_________________________________
How to Crop Your Pictures and Get Great Enlargements on www.iPrints.com

Using our iPrints.com online site to order prints and enlargements is easy. There's virtually no learning curve involved!
  • Click here to order. Or, connect to iPrints.com to see all of our products and services.
  • Our sites will walk you through each step of the ordering process.
  • You'll be uploading your pictures to us over the Internet. This is pretty much done automatically.
  • All you need to do is select the pictures you want and follow the easy instructions.
Let's go through an example that will show you how easy it is to crop a photograph. We'll use a picture of my wife and me shown below:

Our iPrints.com site will show each of your pictures, one at a time. All the print sizes you can order are clearly shown.

Green bars indicate resolution (for sharp prints.) Choose sizes with 3 or more bars.

I'll select an 8" x 10" print size and key in the number of prints I want. A cropping icon will open up next to the size(s) chosen:

The cropping icon is next to the 8x10 matte print.

I'll click on the icon and a crop box...set to 8 x 10 proportions for this picture...will open over my image:

Square cropping "handles" allow you to reduce the size of the crop box.

If I click on the corner handle at the arrow and drag it down and to the right, the cropped area within the dotted lines will get smaller. (Using only the corner handles is important as it makes the crop proportional to the print size.)

I'll click within the picture area and move the crop box over the area of my image that I want on my print:

My cropped (and smaller) image is the area within the dotted lines.

Now, all I need to do is to click the check box at the top to set my cropping preference.

Then, I'll move on to my next picture.

Doing a crop like this takes a matter of seconds. Your cropping preferences are automatically sent to our laboratory for each print.

Cropping is that easy! Try it yourself.

When you've selected and cropped all your pictures you simply click on Complete Order to finalize and submit your order.

Special Cropping or Other Requests:

Sometimes you'll want to include the entire picture area on a traditional print size such as an 8 x 10. (White borders, like the ones shown, here will show on your print.)

Fit-to-Frame Is useful when you want the full image to
fit a standard picture frame

We can do this "fit-to-frame" cropping for you in-lab if you request it in Special Instructions.

Just key in any Special Instructions for our techs to follow.

It is also possible to order non-published services, such as print texturing or mounting in Special Instructions. We'll do our best to satisfy your requests.

If you don't crop your own prints:

Our technicians will routinely crop traditional print sizes to the most pleasing layout...in their opinion. Most likely you'll be very satisfied with their cropping.

But, I really think it makes sense for you to use the simple techniques I've described above to have prints cropped "your way."

_________________________________
Professional & Advanced Amateur Photographers Often Use Our ROES (Remote Order Entry System) Software

ROES software is designed to make it very easy for pros and computer-savvy amateurs to precisely crop their pictures.

But, ROES is a bit more complicated to explain and would make this newsletter too long.

So, please click here if you would like to read an article on how to crop in ROES.

Would you like to see how ROES works?
Please feel free to download our complimentary ROES software by clicking here. Then, click here for a step-by-step instructions on how to use ROES.

_________________________________

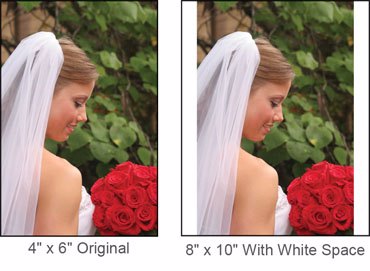
Producing perfect enlargements...as we do every day in our laboratory...isn't easy.

Here's why we're able to consistently give you the pro quality you deserve:
  • Every one of your pictures is individually color corrected by a top technician.
  • We print on Kodak professional papers; not the light-weight, consumer-grade papers used by retail stores & other online sites.
    • Your prints show richer, more true-to-life color.
    • 100 year archival life
  • State-of-the-art laser printing systems assure deeper blacks and brighter whites.
Trust our caring technicians to make your prints as good as they can be. We'll treat your pictures as we would treat our own.

You snap the pictures ... we'll do the rest!


Best wishes,

Dale
Dale Farkas
President, iPrints.com & iPrintsPro.com
(Online services of Dale Laboratories)

Questions? Call (800) 327-1776. We're here to help!
 
_________________________________

*All orders must be submitted online on iPrints.com or iPrintsPro.com. The 20% discount excludes postage, album pages, complete photo albums, gallery blocks, mounting and other finishing services.

Please forward this newsletter to friends who you feel would benefit from its tips!


Share this