|
QUICK LINKS FOR ONLINE ORDERS
|
____________________
|
|
Dear ,
Here are some tips that are applicable to summer photography. They come from an article by Erin Manning.
I added some content...including tips on designing photo books. I think you'll find some interesting pointers.
Take advantage of our Spring Into Summer 4" x 6" sale. Order fully color corrected proofs at great prices. Pro lustre or glossy prints are just 19¢ each; metallic only 25¢.
This sale runs through the entire summer!
No special codes are required. Just take your best shots and order online at iPrints.com!*
Dale
________________________________
|
 Tip #1: Explore The Light Tip #1: Explore The Light
Learn to see the subtleties of light. Notice if the shadows are hard-edged or soft-edged.
A general rule for beautiful images is to plan your photo shoot for early morning or late afternoon because softer shadows equate to more flattering light.
You'll be amazed at how light playing off a subject...all by itself...can create really beautiful images.
_________________________________
|
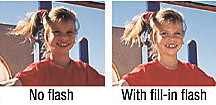
Tip #2: Know When To Use Your Flash...and When To Turn It Off
It's usually easier to capture interesting nuances of natural light if you turn off your on-camera flash.
On the other hand, if you're taking a back-lit portrait in bright sunlight, you will probably want to fill in deep shadows with automatic fill-in flash.
My suggestion: Don't lock yourself into any standing rule regarding flash.
_________________________________
|
Tip #3: How To Deal With Mid-Day Sunlight
Take beautiful pictures in the middle of a bright, sunny day by placing your subject in a shaded area near direct sunlight.
Using open doorways or the shade of a tree or building will soften your shadows while giving your picture an interesting visual context.
_________________________________
|
Tip #4: Compose "By the Numbers" For Great Photographs
Using the Rule of Thirds will help you create more compelling photographs. This particular tip will help you win more photo contests than any other.*
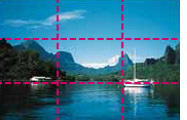
Envision a tic-tac-toe board in your viewfinder.

Compose your shots to include distinct visual elements in either one third or two thirds sections of your picture.
Note how we've included the sky in the top third, the water in the bottom section and the mountains in the middle. From left to right you can see that the white boat and the building are each in their own third.
*This simple photo won me a luxury cruise for two in a Windstar Cruises photo contest!
_________________________________
|
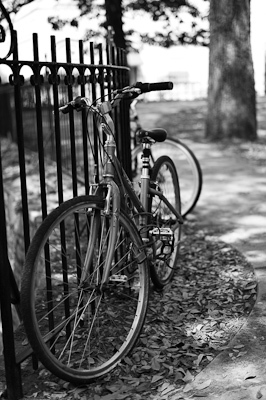
Tip #5: Choose An Interesting Frame Within Your Pictures
Overhanging branches, arches or a unique doorway can all draw the viewer's eye into your picture.
We added a sloppy border to the top photo for a "different" bordered effect.
Adding an artistic border is easy. Just click on
Get Creative when you order online at www.iprints.com.
Then, click
Add Creative Edges and Borders.
_________________________________
|
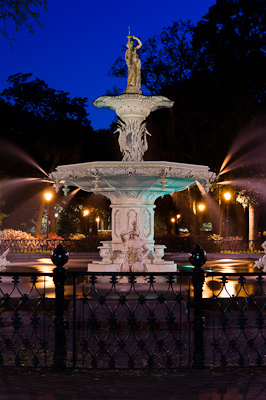
Tip #6: Think About Color
From the vibrant contrast of bright, primary colors to the soft, Zen-like mood of harmonious pinks and greens, color can provide emotional content to a photograph.
_________________________________
|
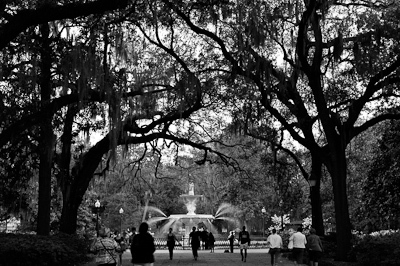
Tip #7: Control The Light With Reflectors
Create a more attractive image by bouncing available light with a simple reflector.
Bouncing light brightens up faces, gets rid of shadows and creates a catch-light in your subject's eyes. Diffusing light softens harsh shadows falling upon your subject.
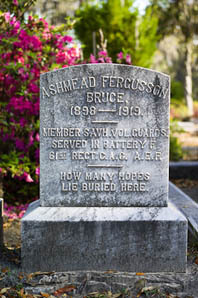
Using a reflector at the right angle brought out essential detail in this Savannah tombstone.
You can buy a reflector at a camera store. But, you can also use common household items to bounce or diffuse light onto your subject.
Aluminum foil wrapped around a baking sheet, a car dashboard reflector or a white foam core board can be used to reflect light. Translucent fabric, sheer shower curtains or plastic bags can be used to diffuse light.
_________________________________
|
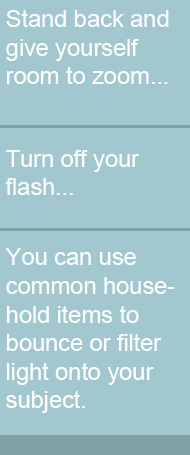
Tip #8: Give Yourself Room To Zoom
To eliminate distracting elements and provide a flattering perspective - stand back and give yourself room to zoom into your subject and fill the frame.
_________________________________
|
Tip #9: Consider the Direction of the Light
- Front light can look flat but diminishes lumps, bumps and wrinkles.
- Sidelight creates dimension and form.
- Backlight can create a silhouette or a rim of light around your subject.
- Top light isn't flattering and should be avoided.
_________________________________
|
Tip #10: Tell A Story With Multiple Images
Sometimes you don't want to try to cover an entire subject with a single picture. Try varying the distance and angle in a series of photographs.
Consider a wide-angle shot of an area, a mid-range view and a detailed close-up. You never know which will be the perfect shot...and groupings of pictures are often more effective than a single image.
_________________________________
|
Photo Books
Our new photo books give you an easy way to bring multiple pictures together to tell a story. Photo books are perfect for vacations or any special event.
These beautiful books are literally the best in the world.
We print on double-sided Kodak
professional photographic paper
(ours are not the plain paper books typically sold to consumers.)
Here's a 10 page photo book (front/back cover and 4 double 8" x 8" pages) I designed of a visit to Disney's Animal Kingdom:
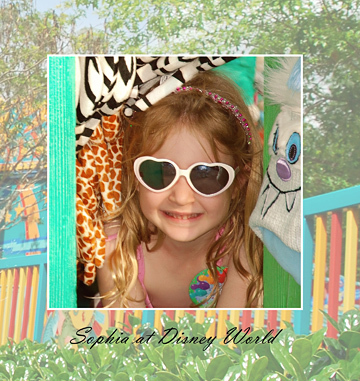 |
| 8" x 8" Front Cover |
 |
| These are 2 page spreads. The left & right side are each 8" x 8". |
- Design Time: 20 minutes
- Technique:
- I downloaded my lab's easy-to-use design software.
- Click here to download our
free software for
your book.
- Then, I dragged-and-dropped the pictures I wanted into several of our pre-designed templates.
- Dozens of templates are available.
- Just choose the template(s) you want.
- Experiment with our templates by dragging in your pictures.
- Click another template to see a different look.
- Add effects like borders and backgrounds by simply clicking on radio buttons.
-
Include from 1 to 14 images on a single page.
- I followed the online instructions to place my order.
- Turn-around: Same day.
- Cost: Just $18.95
- Plus shipping if we mail your book to you.
Please click here to start your order. You'll see simple step-by-step instructions.
Getting America's best photo books is fast and easy. You'll have a lot of fun creating your own, custom books.
Believe me, this is a lot easier than you think!
If you need any
assistance or coaching, please call us at (800) 327-1776.
We're here to help!
_________________________________
|
|
Our Spring Into Summer Sale: Prices Slashed on All 4" x 6" Proofs...Including Metallic
Images on cell phones and iPads are nice.
But, judging how your artisic photographs will look and crop...
plus being sure that they'll be there into the future...is best done with a proof.
So, we're reducing our prices for 4" x 6" proofs on iPrints.com to just 19¢ ea. for glossy or lustre/matte prints and to only 25¢ for metallic.
There are no discount codes or anything special for you to do. Just place your online order at iPrints.com any time between now and September 5th.
I promise you top-quality, color-corrected prints on all your print sizes. You snap the pictures...we'll do the rest!
Best wishes,
Dale
Dale Farkas
President, iPrints.com & iPrintsPro.com
(Online services of Dale Laboratories)
Questions? Call (800) 327-1776. We're here to help!
_________________________________
Photo Credits: David Farkas (my son) from his Savannah collection. Visit David's blog at www.reddotforum.com to see more.
*These proofing sale prices for color corrected lustre/matte, glossy and metallic proofs are available on iPrints.com. Pros and advanced amateurs can order 19¢ lustre proofs on our ROES professional site in the Proofing
(Studio Adjusted Color) catalog
(no lab color corrections.)
|
|