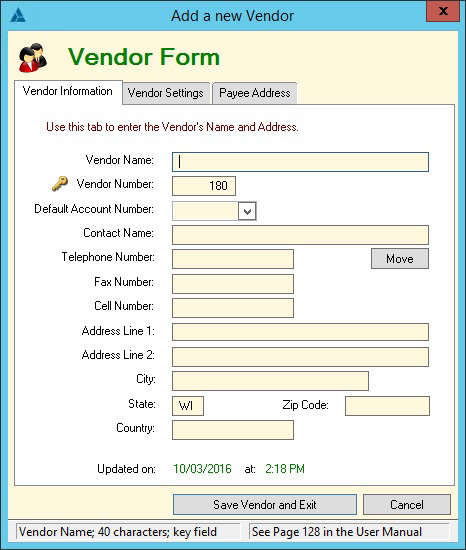
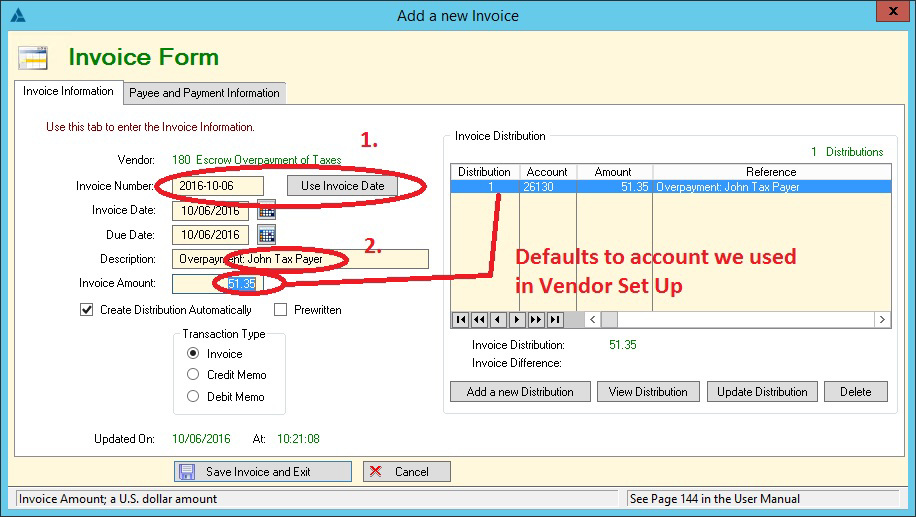
When you are ready to create an invoice for that vendor, you highlight the vendor and set the invoice tab on the right side of your screen. Then click on Add an Invoice and it wil bring you to this screen.
1. Here you first must enter the Invoice Number. If you are cutting several refund checks at once, you can select "Use Invoice Date," however BE CAUTIONED, if you do this, you must add a letter, number or series at the end to distinguish. You CANNOT have two identical invoice numbers for the same vendor. It will cause you a lot of problems and probably several hours on the phone with us at support.
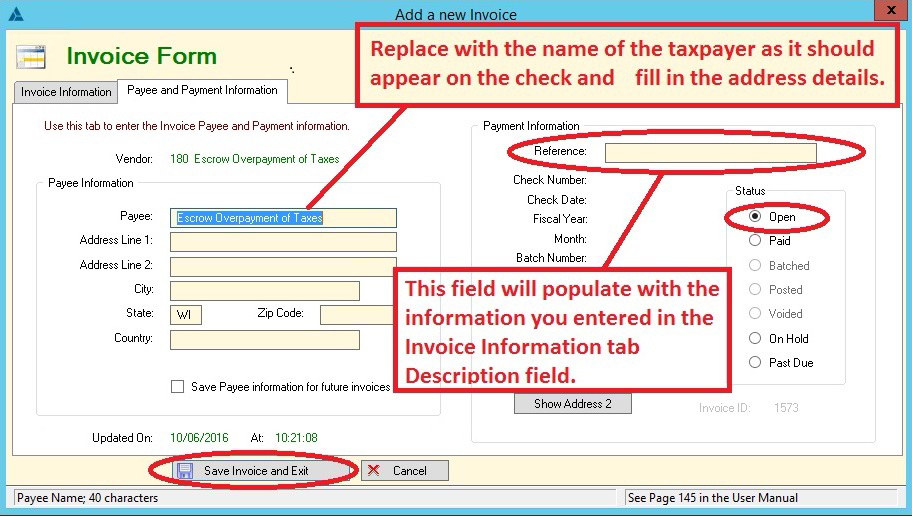
2. You can enter the individual taxpayer name after the colon so you can distinguish different refunds when running reports.
When you enter the amount, it will automatically populate the distribution with the default account number we set up when doing Vendor Set Up, but if necessary, you may alter that by clicking on "Add a New Distribution" or "Update Distribution."
|